
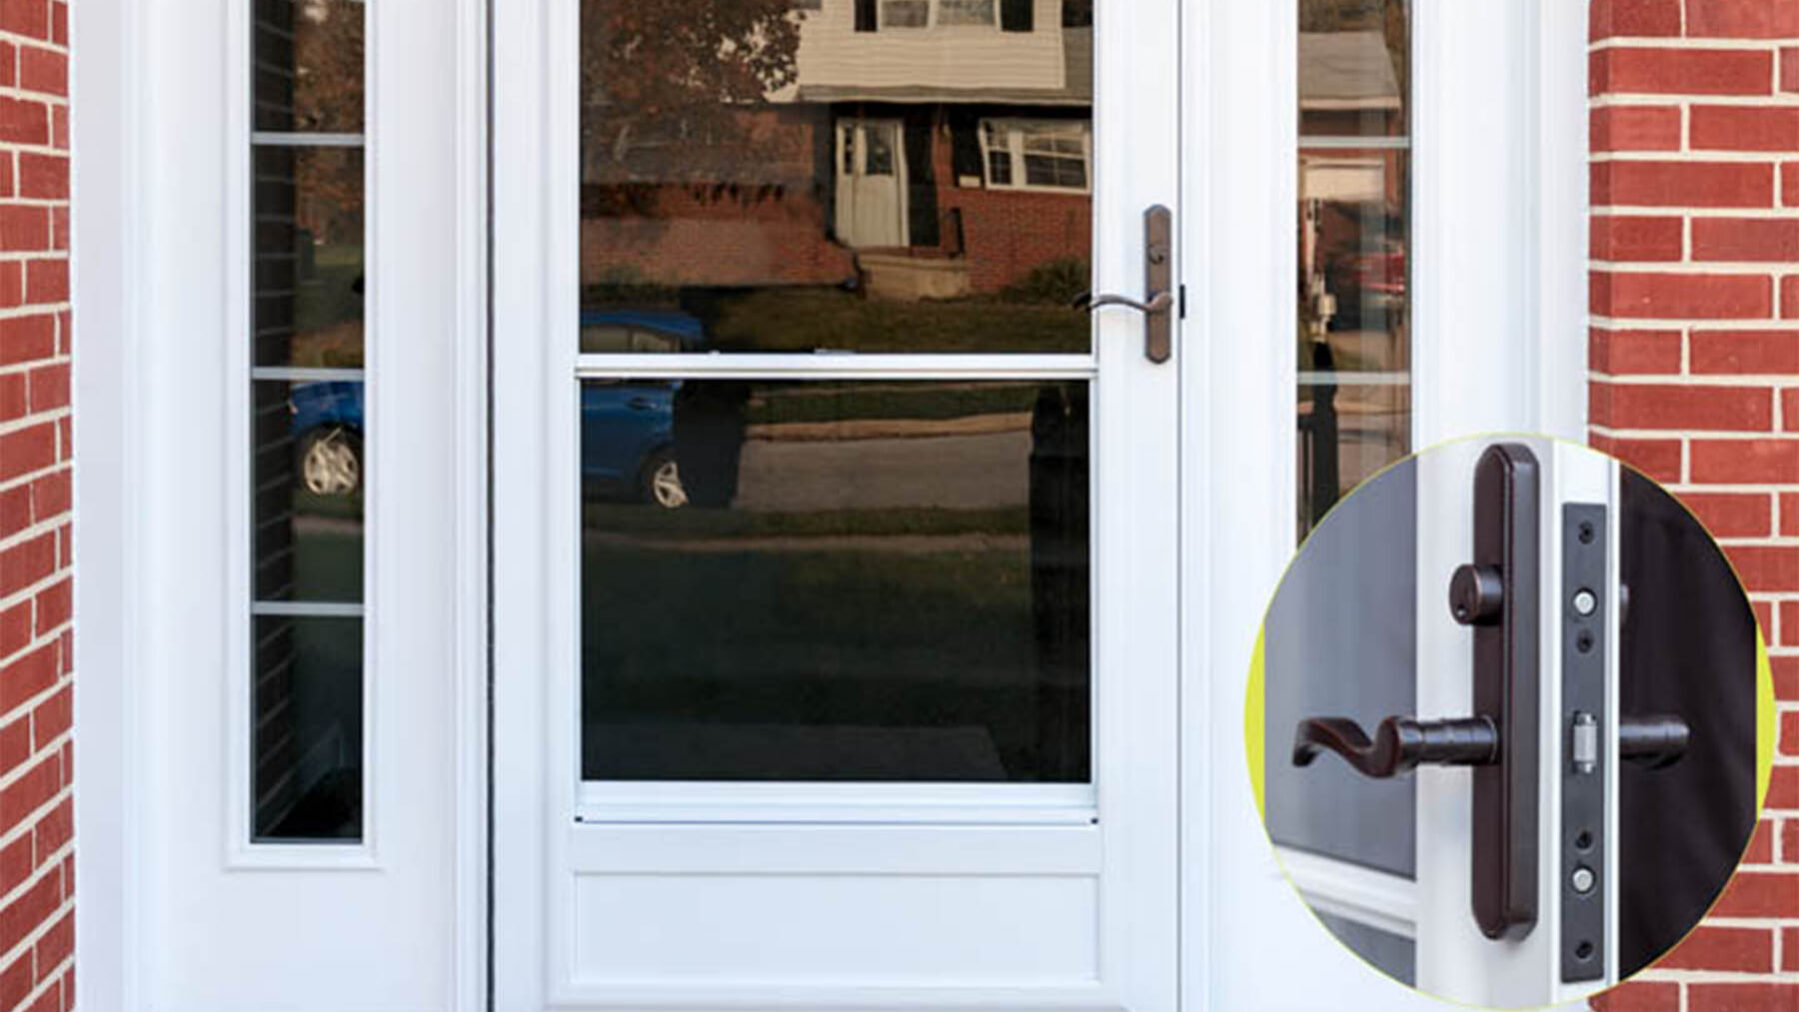
Yes, a storm door handle can usually be replaced in under 30 minutes, and many homeowners choose to do it themselves with basic tools. Whether your handle is loose, broken, or outdated, replacing it is a simple way to improve both function and security.
In this guide, we’ll walk you through how to replace a storm door handle step by step, how to choose the right replacement, and when it makes sense to call a professional. Master Seal serves homeowners across Baltimore, MD and the DC metro area, offering expert help when you need it.
If you’re upgrading your entry system, you can also explore our aluminum storm doors for long-term durability and performance.
- Before you go to the hardware store, measure and take pictures. Take simple photos of the door handle and the strikeplate (where the door/lock latches to the frame). Measure how wide your door is and the dimensions of the strikeplate, including how far screws are placed. Note whether the handle has a lock or if you rely on a separate deadbolt.
- Install should take less than 30 minutes if you’re just swapping handles with the same dimensions and features. Plan for a longer installation if you need to modify the handle, frame, or strikeplate.
- The most common handle hole spacing options are 3 holes spaced ⅞” apart or 1-¾” from the top hole to the bottom.1
- You can find full sets including handles/knobs, latches, and strikeplates.
- If your door or frame is damaged, don’t attempt to just swap the handle and expect issues to be resolved. Call a professional if you’re not comfortable changing a door or doorframe.
Tools you’ll need
- Phillips-head screwdriver
- Flathead screwdriver
- Adjustable wrench or pliers
- Power drill (if needed)
- Measuring tape
- Safety glasses
- Hacksaw or pliers if your handle spindle is stuck or rusted
If you’re not comfortable using these tools—or if you get into your project and realize your door needs to be replaced—Master Seal offers aluminum storm doors and installation.
1. Remove the old handle
Start by unscrewing the interior and exterior handle pieces. Once removed, gently pull both sides apart.
Pay close attention to the spindle, the metal rod that connects the handles through the door. Slide it out carefully.
If your storm door handle fell off, check for:
- Stripped screws
- A broken or bent spindle
- Missing hardware pieces
Identifying the issue early helps ensure you purchase the correct replacement.
2. Measure hole spacing
Measure the distance between the mounting holes. The most common spacing is 1-3/4 inches, but some doors use non-standard measurements.
If your spacing is different, you may need to:
- Drill new holes
- Choose a universal or adjustable handle kit
3. Install the new handle
Insert the new spindle through the latch mechanism.
If the spindle is too long:
- Trim it using pre-marked notches or a hacksaw
- Attach the interior and exterior handles, aligning them with the mounting holes.
If your replacement kit includes a backplate, install it before securing the handle.
4. Attach the latch and strike plate
Install or reconnect the latch mechanism inside the door edge.
Attach the strike plate to the door frame so the latch aligns properly when the door closes.
If installing a new strike plate:
- Drill pilot holes to prevent splitting
- Ensure proper alignment before tightening
5. Test and adjust
Open and close the door several times to test the handle.
If you notice issues:
- Loose handle → tighten screws
- Misalignment → adjust strike plate position
- Jammed lock → check spindle alignment or latch position
Making small adjustments now helps prevent long-term wear.
Are storm door handles universal?
No. Some surface-mounted storm door handles share common hole spacing, but a kit can still fail to fit because of door thickness, spindle dimensions, mounting style, handedness, or the latch and strike arrangement. Product-specific installation kits can also include their own screw lengths, striker plates, shims, and handle components.
Measure before you buy, and compare the replacement instructions with the existing door. A kit described as universal usually fits a range of common surface-mounted setups; it does not guarantee a drop-in fit for every storm or screen door.
If you’re considering a universal storm door handle replacement, pay close attention to these labels on the package and compare them to the measurements and pictures you took of your door:
- Hole spacing and number of mounting holes
- Door thickness and spindle length
- Surface-mounted or mortise-style hardware
- Lever, push-button, pull, knob, or keyed operation
- Left- or right-hand orientation when the hardware is not reversible
- Latch, strike plate, and lock compatibility
Common storm door hardware fixes (latch, knob, and lock replacement)
A broken-looking handle does not always require a full storm door hardware replacement. Work from the simplest cause—loose fasteners or strike misalignment—toward the more involved parts.
Storm door latch or lock replacement
If the handle moves but the latch does not retract, inspect the spindle connection and interior latch. If the latch is worn or broken, remove the handle set, match the latch dimensions and connection points, and install the replacement using the same measure-and-align process from the main guide.
Adjust the strike plate if the latch works with the door open but misses when closed.
Replace the latch if its spring or internal mechanism no longer returns smoothly.
Use the exact lock and fastener instructions supplied with the replacement kit.
Storm door knob replacement
A storm door knob replacement may use simple surface-mounted hardware or a knob attached to a product-specific stem. Remove the set screw or mounting screws, photograph the original assembly, and match the spindle, screw pattern, and interior latch before buying parts.
For a quick overview of the available operating styles, see 5 Storm Door Handle Types.
Remember that you’ll likely be using the handle a lot, so keep fit and comfortable use in mind, and don’t just judge on appearance alone.
Parts-only repair
For a loose or stuck storm door handle, check the small parts before replacing the full set. Tighten intact fasteners, replace damaged screws with the size specified for the hardware, align the strike plate, and inspect the spindle for bending or wear. Avoid substituting a longer screw without confirming that it won’t damage the door or interfere with the mechanism.
If the existing parts are worn or incomplete, review Master Seal’s storm door hardware options as part of a professional upgrade.
How to choose the right replacement storm door handle
Bring your measurements and clear photos of both sides of the existing hardware when you shop. You can look at a local hardware store, the door manufacturer’s parts site, or a professional storm door provider. Match fit first; then compare operation, finish, and lock features.
Handle type
Choose a lever, push-button, pull, knob, or mortise set that matches the existing door preparation. Changing to a different mounting style may require drilling or may leave old holes exposed.
Finish and style
Choose a finish that coordinates with nearby entry hardware and holds up to regular outdoor use. For deeper design inspiration, browse storm door hardware styles.
Door orientation and lock function
Confirm whether the replacement is reversible or made for a specific door swing. If the set includes a lock, verify that the key cylinder, deadbolt, latch, and strike are designed to work together.
Where to buy a replacement kit
Common surface-mounted kits are available through hardware stores and manufacturer parts sites. For a coordinated door-and-hardware upgrade, compare Master Seal’s storm door hardware options.
Storm door handle hardware comparison
| Hardware type | Mounting style | Typical hole spacing | Best for | DIY difficulty |
| Push-button handle | Surface-mounted | Often 1-3/4 in; verify kit | Simple replacement with matching prep | Low when holes match |
| Pull handle | Usually surface-mounted | Often 1-3/4 in; verify kit | Easy one-motion opening | Low to moderate |
| Mortise handle set | Recessed in door edge | Product-specific | Integrated latch or lock systems | High |
| Knob | Surface-mounted or product-specific stem | Varies; measure existing prep | Compact traditional operation | Low to moderate |
| Latch/lock only | Interior or edge mechanism | Match existing connection points | Working handle with failed latch or lock | Low to high |
When to call a professional for storm door handle replacement
DIY is reasonable when the frame is sound, the replacement matches the existing preparation, and the instructions are within your comfort level. A professional is the better choice when the repair reaches the door structure or an integrated lock system.
Give DIY a try if:
- The mounting holes and door thickness match the replacement kit
- The frame is square and undamaged
- The kit includes the required handle, latch, spindle, strike, and fasteners
- The old hardware comes apart without force, and the new pieces align cleanly
- You’re comfortable using the required tools
Call a professional when:
- The door frame, mounting rail, or hinge side is bent, split, loose, or misaligned
- The hardware is recessed, integrated with a lock, or specific to the door model
- A stuck spindle or corroded fastener will not release with reasonable hand pressure
- New holes are required, and you’re not comfortable drilling the door
- The handle or latch still binds after careful alignment and adjustment
Master Seal storm door service
If the handle problem is due to a damaged frame, an aging door, or hardware for which you can’t find a match, Master Seal can help you consider a professional storm door upgrade. We’ve served Maryland and Washington D.C. area homeowners since 1994 and offer free in-home estimates.
Explore professionally installed aluminum storm doors, or request a free in-home estimate to discuss your door and hardware needs.
Frequently asked questions
The total depends on the handle type, whether the replacement matches the existing holes, and whether the latch, lock, frame, or full door also needs work. You may find DIY kits ranging from $40 to $100+.
Many surface-mounted storm door handles use 1-3/4-inch spacing measured center to center, but not every handle follows that pattern. Measure the existing holes and compare the door thickness and spindle before buying a kit.
Often, yes, if the handle and spindle still work and a compatible latch is available. Match the latch dimensions, connection points, and strike arrangement, then test the door before tightening every fastener.
Not always. Similar-looking sets can use different mounting holes, spindles, door-thickness ranges, locks, or strikes, so choose by measurements and documented compatibility instead of appearance.
Remove the hardware and inspect the screws, mounting holes, spindle, and latch alignment. Replace damaged parts with the specified sizes, tighten the set evenly, and check whether door sag or a shifted strike is putting extra force on the handle.